
Tutorials
Flash Video Encoder CS3 (FLV)
Flash CS3 Video Encoder is the compression/encoding application included with Flash Professional CS3; it exports videos to FLV format.Tutorial requirements:
- You must have Flash Professional CS3 + Flash Video Encoder CS3 installed in your system.
- Our compression profiles (you will find the download link in the Tools page).
NOTE: The user interface of the following screen captures may be different than yours, since it depends on the operating system your are using (Windows XP, Vista, Mac OSX, etc).
A format with no future
FLV has become obsolete and is rarely used today. It is strongy recommended to use H.264 instead.
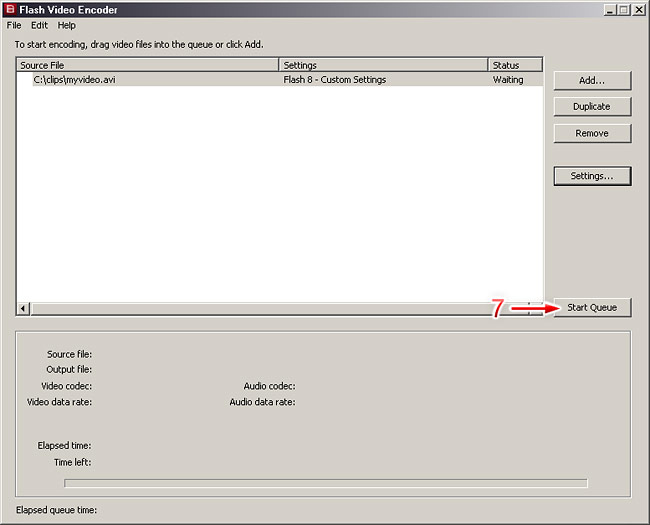
1) Open the program... and click on "Add" to select the source video file you want to encode.
NOTE: We recommend to use a source video file with the highest possible quality.
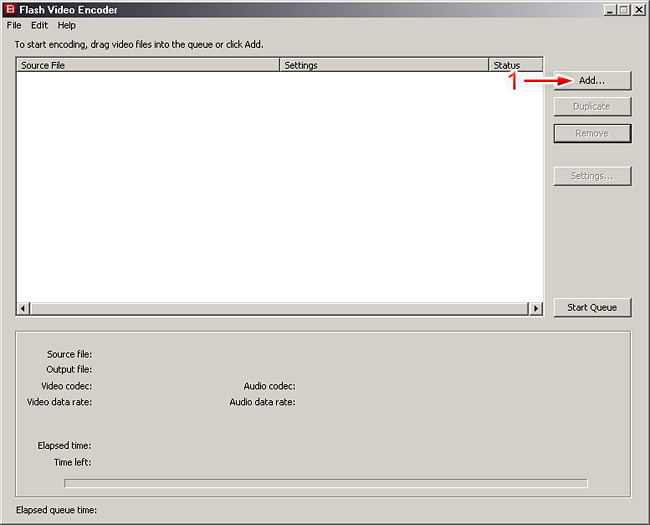
The selected file will be added to the list.
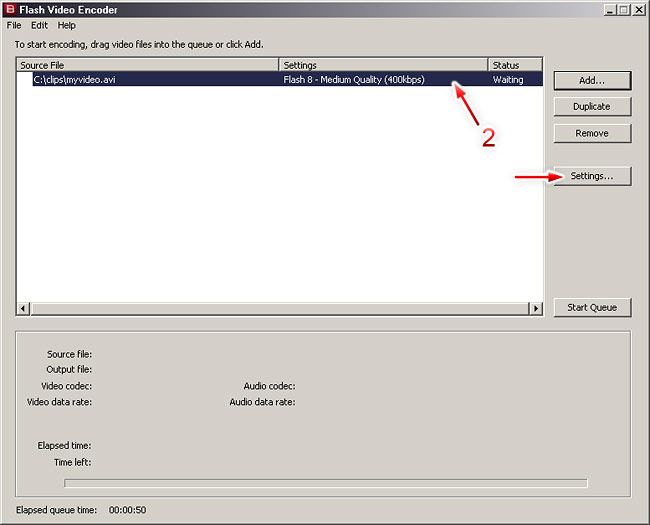
2) In the list, click the file and then on "Settings": a new window will open.
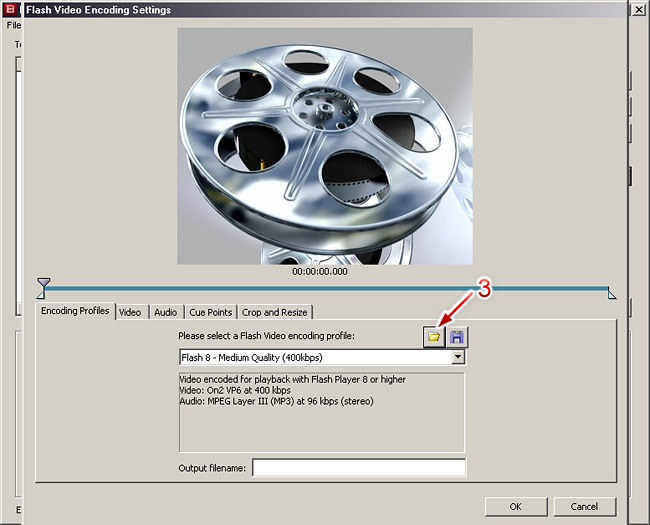
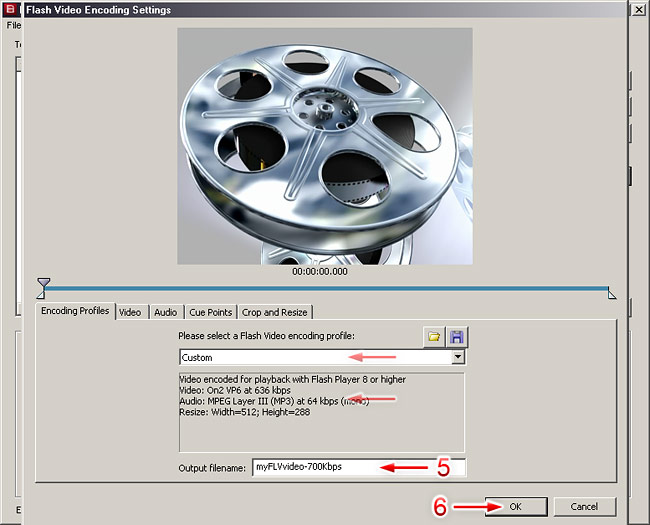
3) In the new window, click the open profile button:
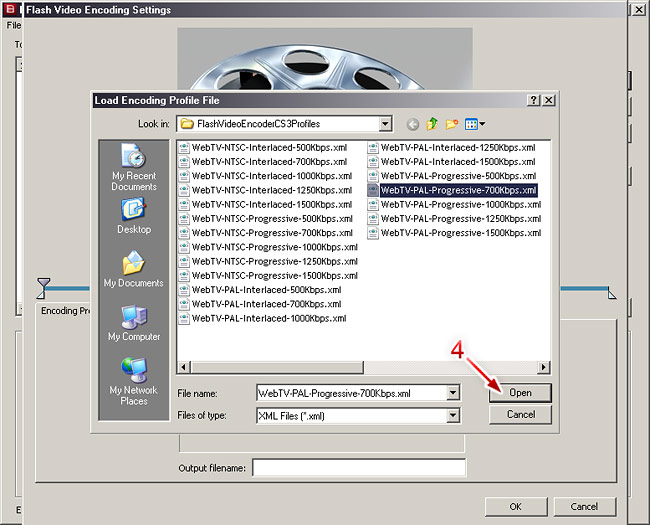
4) Select one of the supplied profiles.
NOTE: The quality of the selected profile (Ex. 700Kbps) must match the quality specified in your WebTV configuration (check out the Configuration tutorial). If your WebTV have multiple qualities, you must compress the video in each of the specified qualities. In this example we have used the "WebTV-PAL-Progressive-700Kbps" profile, but if your WebTV is configured, for example, for 500Kbps and 1000Kbps videos, then you must compress your video using the corresponding profiles.
"Interlaced vs Progressive": Usually, videos are "Interlaced", if you are not sure, it is better to use the "Interlaced" profiles.
Once you have selected the desired profile, you will see how the compression settings automatically change.
5) Enter the name for the "target" file.
NOTE: We recommend to include the quality as part of the file name, this way it will be easier to identify it when you are ready to upload it to your WebTV.
6) Click on "OK"
If you wish to compress/encode additional files, or the same file in other qualities, then this is the moment to add them to the queue (repeat steps 1 to 6)
7) In the main window, click on "Start Queue" in order to start the compression process.
The program will start compressing the video(s) and you will see a progress report at the bottom.
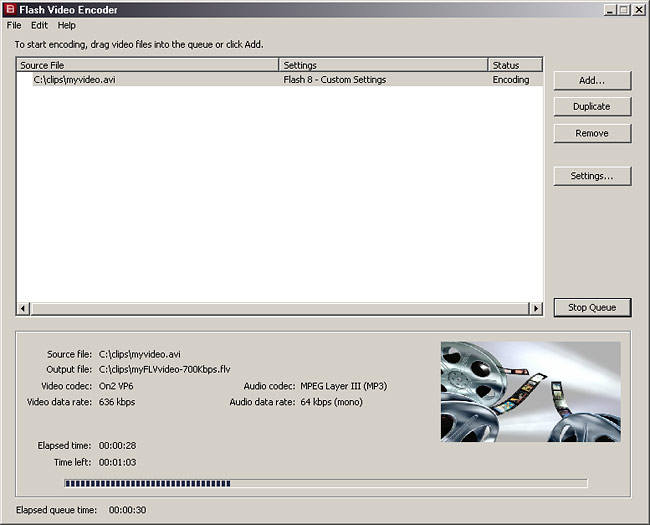
That´s all! You will find the compressed/encoded file(s) inside the folder where the source file(s) is(are) located.
Other considerations.
1. Modifying a compression profile. In this tutorial we have used a compression profile to encode a video file. However, it is possible that you require to modify a profile to better suit your WebTV´s qualities. One of the most important thing to keep in mind is the target bitrate, for example, if you plan to encode videos for a bandwidth of XXXKbps, that number must be the result of adding the audio track bitrate and the video track bitrate; if the audio track bitrate is 128Kbps, then the video track bitrate must be XXX - 128.
2. What happens if I upload to the WebTV a video file with a different bitrate (bandwidth) than the one specified for a particular Quality?. Well, the worst thing that could happen is that the automatic bandwidth detection won´t be reliable. Therefore, from a user´s perspective, we recommend to keep the system consistency.